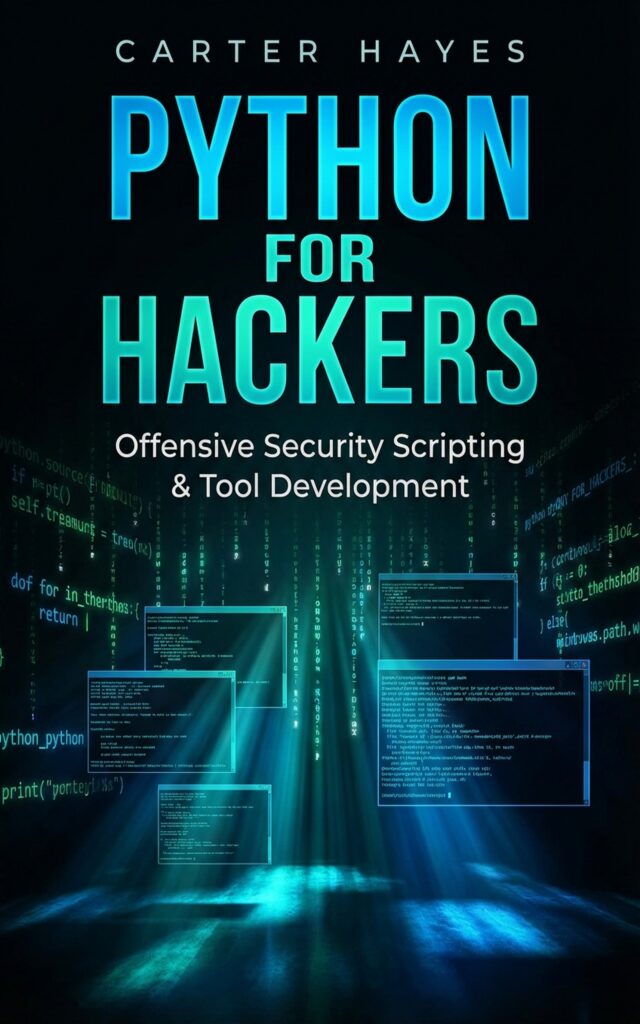
Be the first to review “Python for Hackers: Offensive Security Scripting & Tool Development” Cancel reply

by Carter Hayes
Cybersecurity is a field where practical skill matters more than memorized facts. The threats facing organizations and individuals grow more sophisticated every year, and the best defense is a workforce that understands how attackers actually operate. This book gives you the hands-on knowledge and structured approach you need to move from curiosity to real competence.
The material is designed for people who want real results, not just theory. It explains the concepts behind the tools, walks you through realistic scenarios, and shows you how to apply what you learn in actual testing environments. Whether you are studying for a certification, building a security career, or protecting your own infrastructure, this guide is built to move you forward.
What sets this book apart is its focus on doing the work. Each chapter connects ideas to actions, so you understand not only what a technique does but why it works and when to use it. The exercises and examples are built around tools and situations you are likely to encounter in real assessments, labs, and job roles.
By the time you finish, you will have more than a list of commands. You will understand how attacks fit together, how to spot weak points in a system, and how to explain your findings in a way that helps people fix problems. Those skills are the foundation of a successful career in cybersecurity.
Not sure yet? Here is the full table of contents and the first chapter, exactly as it appears in the book.
18 chapters in the complete book.
Before you write a single line of offensive Python code, you need a development environment that’s both powerful and secure. Think of this as assembling your workshop before building anything dangerous. The last thing you want is to accidentally run a port scanner against production systems or inadvertently expose your exploit code to the internet because your environment wasn’t properly isolated. This chapter walks you through building a professional-grade offensive security Python environment from the ground up, with an emphasis on safety, reproducibility, and efficiency.
The beauty of Python for security work lies in its versatility across platforms and its massive ecosystem of libraries. Whether you’re developing reconnaissance tools, writing custom exploits, or automating penetration testing workflows, having the right foundation makes the difference between productive research and frustrating troubleshooting sessions. We’ll cover everything from base Python installations across different operating systems to containerized testing labs that let you detonate malicious code without fear.
Choosing Your Operating System Foundation
Most offensive security practitioners work primarily from Linux distributions, with Kali Linux being the de facto standard. Kali ships with Python preinstalled and includes countless security tools already integrated. However, you’ll often need to work across multiple platforms. Target environments might be Windows servers, macOS endpoints, or various Linux flavors. Understanding how to set up Python across all three major operating systems ensures you can develop tools that work anywhere and test them in environments that mirror your targets.
Kali Linux remains the gold standard for penetration testing work. Python 3.x comes already installed, typically alongside Python 2.x for legacy tool compatibility. Most Kali installations place Python 3 at /usr/bin/python3, and you can verify your version by running python3 –version in a terminal. As of recent releases, Python 3.11 or newer is standard. The distribution also includes pip3 for package management and a wealth of preinstalled security libraries like Scapy for packet manipulation and Requests for HTTP operations.
For Windows users, offensive security work often happens on a Windows 10 or 11 host running virtualized Kali or other Linux distributions. Native Windows Python development, however, is essential when you’re targeting Windows environments or developing Windows-specific exploits. Download the official Python installer from python.org, and during installation, make absolutely certain you check the box to add Python to your PATH variable. This prevents countless headaches later when trying to run scripts from the command line. The Windows installation includes pip by default, and you’ll want to run everything from an elevated PowerShell or Command Prompt to avoid permission issues when installing packages systemwide.
macOS ships with Python, but it’s typically an older version managed by the operating system itself. Never rely on the system Python for development work: modifying it can break OS-level tools. Instead, install Python 3 via Homebrew, the de facto package manager for macOS. After installing Homebrew with the command available on brew.sh, run brew install python3 to get the latest stable version. Homebrew installs Python to /usr/local/bin/python3, keeping it separate from the system installation. This approach gives you a clean, manageable Python environment without touching Apple’s system files.
Virtual Environments: Your Safety Net
Virtual environments are nonnegotiable for offensive security Python development. They create isolated Python installations where you can install packages, modify configurations, and test potentially destructive code without affecting your base system. Think of each virtual environment as a disposable sandbox. If you install a compromised package, corrupt your installation, or need conflicting versions of the same library for different projects, virtual environments keep the chaos contained.
Python’s built-in venv module handles most virtual environment needs. To create a new virtual environment, navigate to your project directory and run python3 -m venv venv. This creates a directory called venv containing a complete Python installation, its own pip, and a dedicated site-packages directory for libraries. Activate it on Linux or macOS with source venv/bin/activate or on Windows with venvScriptsactivate. Once activated, your shell prompt changes to show the environment name, and any pip install commands only affect this isolated space.
For more advanced use cases, particularly when you need to manage multiple Python versions simultaneously, consider pyenv. This tool lets you install and switch between different Python versions effortlessly. Security tools sometimes require specific Python versions due to deprecated features or library compatibility issues. With pyenv, you can have Python 3.9 for one project, Python 3.11 for another, and Python 3.12 for experimental work, all on the same machine without conflicts. Install it using your distribution’s package manager or via the installer script from the official GitHub repository.
Structure your project directories with virtual environments from day one. A typical offensive security project might have a layout like exploit_project/venv/ for the virtual environment, exploit_project/src/ for your Python scripts, exploit_project/tests/ for testing code, and exploit_project/requirements.txt listing all dependencies. The requirements.txt file is essential because it lets you recreate the exact environment anywhere by running pip install -r requirements.txt. When you’re sharing tools with teammates or deploying them to other systems, this reproducibility prevents the infamous “it works on my machine” problem.
IDE Selection for Security Development
Your IDE choice significantly impacts productivity. For offensive security work, you need powerful debugging capabilities, integrated terminal access, and syntax highlighting that handles complex code structures. Three IDEs dominate the security development space: Visual Studio Code, PyCharm, and Vim with plugins.
Visual Studio Code has become immensely popular among security researchers because it’s free, lightweight, and extensible. Install the Python extension from Microsoft, which provides IntelliSense code completion, debugging support, and integrated linting. Add the Docker extension if you’re containerizing your tools, and consider the Remote-SSH extension for developing directly on remote Kali VMs. The integrated terminal lets you run scripts without leaving the editor, and its Git integration streamlines version control. The debugging interface is particularly valuable for stepping through exploit code line by line to understand exactly why a payload isn’t triggering as expected.
PyCharm Professional offers the most robust Python development experience, with advanced debugging tools, database integration, and exceptional code navigation. The Professional edition includes remote interpreter support, letting you write code locally while executing it on a remote Kali box via SSH. This proves invaluable when you need your development machine’s creature comforts but your testing must happen on a Linux system with specific network configurations. PyCharm’s scientific mode integrates Jupyter notebooks directly into the IDE, useful for documenting exploitation workflows or testing payloads interactively. The downside? The learning curve and resource consumption. PyCharm is heavier than VS Code.
Vim remains a favorite for terminal-centric workflows, especially when you’re already SSH’d into a remote penetration testing box. With plugins like YouCompleteMe for code completion, vim-python for Python-specific syntax highlighting, and ALE for asynchronous linting, Vim becomes a powerful Python IDE that runs entirely in the terminal. The advantage is speed and universality. Vim is installed on virtually every Linux system you’ll encounter. The disadvantage is the steep learning curve if you’re not already comfortable with modal editing.
Regardless of which IDE you choose, configure a debugger properly. Python’s built-in pdb module works anywhere, but IDE-integrated debuggers provide visual breakpoints, variable inspection, and call stack analysis. When your exploit isn’t working, you need to step through the code watching exactly how variables change, which network packets get sent, and where execution diverges from your expectations. Set up your debugger to work with virtual environments so it can import all your project dependencies during debug sessions.
Essential Security Libraries and Tools
With your base environment configured, it’s time to install the libraries that make offensive Python development possible. Some require compilation of native code, which means you’ll need development headers and compilers installed on your system.
Start with the fundamentals. Scapy is the Swiss Army knife of packet manipulation, letting you craft, send, and analyze network packets at any protocol layer. Install it via pip install scapy, but on Linux systems you may need to run your scripts with sudo to access raw sockets for packet injection. Requests handles HTTP operations cleanly and is essential for web application testing, API interaction, and exploit delivery over HTTP. Install with pip install requests and always check SSL certificate verification settings, you’ll often need to disable verification when testing against self-signed certificates in lab environments.
Cryptography libraries are central to exploit development. The cryptography package provides high-level recipes for encryption, signing, and key derivation along with low-level primitives for custom protocols. Install with pip install cryptography. PyCrypto’s successor, PyCryptodome, offers AES, RSA, and other algorithms with a simpler API. Some older security tools still depend on it, so install via pip install pycryptodome. Be aware that cryptography libraries often include C extensions that require compilation, on Debian-based systems like Kali, ensure you have python3-dev and build-essential packages installed first.
For database interaction during post-exploitation or vulnerability scanning workflows, install SQLAlchemy with pip install sqlalchemy for SQL database abstraction, and pymongo with pip install pymongo for MongoDB interaction. Many modern applications use NoSQL databases, and being able to query them programmatically from your Python tools is invaluable. When testing web applications, install BeautifulSoup4 with pip install beautifulsoup4 for parsing HTML and extracting data, and lxml with pip install lxml for faster XML processing.
Network protocol libraries expand your capabilities significantly. Paramiko (pip install paramiko) provides SSH protocol support for automating remote command execution and file transfers during post-exploitation. Impacket (pip install impacket) is essential for Windows protocol interaction, including SMB, LDAP, and MSRPC operations. Many privilege escalation and lateral movement techniques rely on manipulating these protocols. DNSPython (pip install dnspython) enables DNS query manipulation, zone transfers, and subdomain enumeration.
Compiling native extensions sometimes fails due to missing dependencies. On Kali or Ubuntu, install libssl-dev, libffi-dev, python3-dev, and build-essential before attempting to install packages with C extensions. On Windows, you may need Visual Studio Build Tools, though most popular packages now provide precompiled wheels that eliminate compilation requirements. On macOS, ensure Xcode Command Line Tools are installed with xcode-select –install.
Containerized Testing Environments
Docker containers provide isolated, disposable environments perfect for testing malicious code safely. A container runs your exploit in a sandboxed Linux environment that’s completely separate from your host operating system. If something goes wrong (if your code crashes the system, corrupts files, or triggers unexpected behavior) you simply destroy the container and spin up a fresh one.
Install Docker Desktop on Windows and macOS, or install Docker Engine on Linux via your package manager. Verify the installation with docker –version and docker run hello-world. Once Docker is working, create a Dockerfile for your offensive Python projects. A basic Dockerfile might start with FROM python:3.11-slim to use an official Python base image, then WORKDIR /app to set a working directory, COPY requirements.txt . to bring in your dependency list, and RUN pip install -r requirements.txt to install packages. This creates a reproducible container image where all dependencies are preinstalled.
For testing network tools, use Docker Compose to orchestrate multi-container environments. You might run your exploit code in one container while target services run in others, all connected via a Docker bridge network. This setup mimics real-world network architectures without requiring physical hardware. A docker-compose.yml file can define a vulnerable web application in one container, a database in another, and your attack tools in a third, all communicating through defined network interfaces.
Bind mount your source code into containers during development with docker run -v $(pwd):/app so changes to your Python scripts on the host immediately reflect inside the container. This accelerates the development cycle: you edit code in your IDE, and the running container immediately has access to the updated version. For production deployments or sharing tools with your team, build full container images that include your code and publish them to a private container registry.
Security considerations matter even in containerized environments. Never run containers with –privileged flag unless absolutely necessary, as this grants root access to the host system. When testing kernel exploits or low-level system manipulation, you may have no choice, but understand the risks. Use container resource limits to prevent a runaway process from consuming all system memory or CPU. Specify limits with docker run –memory=512m –cpus=1.0 to constrain resource usage.
Version Control for Sensitive Code
Managing offensive security code requires careful version control practices. Your exploit code, password lists, and proprietary tools should never accidentally leak to public repositories. Git remains the standard, but configuration matters enormously.
Initialize Git in your project directory with git init, then immediately create a comprehensive .gitignore file. At minimum, exclude venv/, pycache/, *.pyc, .env files containing credentials, and any files with sensitive target information. Many developers accidentally commit API keys, database passwords, or internal network details embedded in configuration files. Use environment variables for sensitive data and load them via a library like python-dotenv, then ensure .env files are in .gitignore.
For team collaboration on sensitive tools, use private Git repositories hosted on platforms like GitHub (with private repos), GitLab, or self-hosted Git servers. Never push offensive security code to public repositories, even if you think it’s innocuous. Code that seems harmless to you might contain embedded techniques, target information, or methodology details you didn’t realize were sensitive. Companies have faced serious consequences from developers accidentally exposing penetration testing reports or exploit code publicly.
Commit messages should be professional and avoid explicitly describing illegal activities. Instead of “added exploit for company X’s firewall,” use descriptive but neutral language like “implemented network device authentication bypass module.” Your Git history may be reviewed during legal proceedings or audits, and inflammatory language creates unnecessary risk.
Consider using Git hooks to automatically scan commits for sensitive data before they’re pushed. Tools like git-secrets or truffleHog detect patterns matching API keys, passwords, and other credentials in your commit history. Install these as pre-commit hooks to catch mistakes before they reach your repository. For extremely sensitive projects, use encrypted Git repositories with tools like git-crypt or manage encryption separately using GPG.
Workspace Structure and Rapid Prototyping
Organizing your workspace efficiently accelerates development and reduces cognitive overhead. Create a dedicated directory structure for offensive security projects, separating reconnaissance tools, exploitation frameworks, post-exploitation utilities, and research scripts into logical folders.
A professional workspace might have ~/security/recon/ for subdomain enumeration and asset discovery tools, ~/security/exploits/ for vulnerability exploitation code organized by CVE or vulnerability type, ~/security/post-exploit/ for lateral movement and privilege escalation utilities, and ~/security/research/ for experimental code and proof-of-concept work. Within each project, maintain consistent internal structure: src/ for source code, tests/ for unit tests, docs/ for documentation, and output/ for any files your tools generate.
Rapid prototyping in offensive security often means writing quick-and-dirty scripts to test hypotheses. Create a sandbox directory for throwaway code where you can experiment without worrying about code quality or organization. When a prototype proves valuable, refactor it into a proper tool in your main workspace. This balances the need for fast iteration during research with the requirement for maintainable code in production tools.
Template files accelerate development. Create a basic Python script template that includes standard imports, argument parsing setup with argparse, logging configuration, and error handling. When starting a new tool, copy this template rather than writing boilerplate from scratch. Your template might include common security library imports like requests, socket, and struct, along with try-except blocks for handling network errors and keyboard interrupts gracefully.
Document your tools as you build them. A simple README.md in each project directory should explain what the tool does, how to install dependencies, and basic usage examples. When you return to a project after six months, you’ll appreciate having clear documentation. For complex tools, include a requirements.txt, setup instructions for any system-level dependencies, and example command lines with realistic parameters.
Testing Without Risk
Safely testing offensive code requires multiple layers of protection. Never test tools against systems you don’t own or have explicit written authorization to test. The legal consequences of unauthorized access are severe, and claiming ignorance or accidental targeting provides no legal protection.
Build your own vulnerable lab environment for testing. Tools like VulnHub and HackTheBox provide intentionally vulnerable virtual machines for practice, but custom lab environments give you complete control. Use virtual machines running vulnerable operating systems and applications that match your target environments. VMware Workstation, VirtualBox, or Proxmox let you create isolated networks of virtual machines that can’t reach your production network or the internet.
Network segmentation is critical. Configure your virtualization platform to place test VMs on an isolated virtual network with no route to your host machine’s production network or the internet. This prevents a compromised VM from pivoting to other systems if your exploit succeeds more dramatically than expected. Many virtualization platforms offer “host-only” or “NAT with no external access” network modes perfect for isolated testing.
Snapshot your test VMs before running exploits. Hypervisors let you capture the complete state of a virtual machine, including memory, disk, and configuration. If your exploit corrupts the VM or you want to test the same exploit multiple times against a clean system, revert to the snapshot instead of rebuilding the environment from scratch. This accelerates testing cycles from hours to seconds.
When testing network tools that generate significant traffic, monitor your network connection to ensure packets stay contained. Tools like Wireshark running on your host can capture traffic to verify your exploitation attempts target only the intended test VMs. If you see packets destined for external IP addresses, immediately stop testing and investigate why your tool escaped its intended scope.
For web application testing, consider using Docker containers running vulnerable web applications like DVWA (Damn Vulnerable Web Application), WebGoat, or Mutillidae. These applications are designed for security testing and provide realistic targets without the risk of accidentally attacking production systems. Run them on localhost or an isolated Docker network where they’re completely unreachable from the internet.
Final Configuration Checks
Before moving forward to actual tool development, verify your environment is production-ready. Open a terminal and activate one of your virtual environments. Run python –version to confirm you’re using Python 3.x, preferably 3.9 or newer. Run pip list to verify your essential libraries installed correctly, you should see packages like requests, scapy, cryptography, and any other core dependencies you installed.
Test your IDE’s debugging capabilities by creating a simple script with intentional bugs, setting breakpoints, and stepping through execution. Verify you can inspect variables, examine the call stack, and evaluate expressions in the debug console. These debugging skills become essential when troubleshooting why an exploit isn’t working as expected.
Validate your Docker installation by running a test container with docker run -it python:3.11-slim python –version. If this successfully prints the Python version, your Docker environment is functional. Try building a custom Dockerfile and running a container from it to ensure you understand the complete workflow.
Check your Git configuration with git config –global user.name and git config –global user.email. These should be set to appropriate values for your development work. Review your .gitignore templates and ensure they comprehensively exclude sensitive files.
Finally, test your isolated lab network by attempting to reach the internet from a test VM. This should fail if your isolation is configured correctly. From your test VM, try to ping your host machine. This should also fail unless you’ve explicitly allowed it. Proper isolation ensures that any mistakes during testing can’t impact systems beyond your lab.
You now have a professional-grade offensive security Python development environment. Your workspace is organized for efficiency, your tools are isolated for safety, and your configuration is reproducible across systems. This foundation supports everything you’ll build throughout the rest of this book, from reconnaissance scripts to full exploitation frameworks. The time invested in a solid development environment pays dividends in reduced frustration, faster development cycles, and significantly improved security posture. With your arsenal assembled, you’re ready to start building tools that work reliably, fail safely, and meet professional standards.
… and that is just the beginning. The complete book continues from here, instant download, DRM-free, yours to keep.








Reviews
There are no reviews yet.